#9 The Start
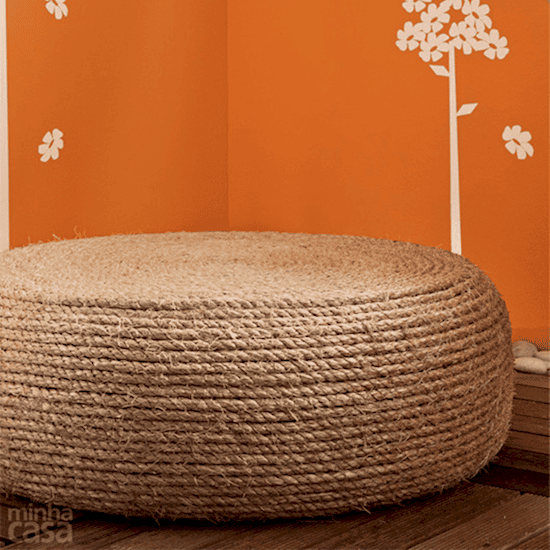
This really sounds weird. Why would someone drill a hole in a useless old tire? Well, now imagine this. You've moved into your place and you have all your major pieces of furniture. You've got your couch and your chair and a really nice glass coffee table upon which you cannot place your feet. So what to do? Why don't you make an Ottoman for yourself? Intriguing, isn't it? Check out the directions to make it.
#8 Requirements
Well, to make this, you'll have to gather certain things. Get rope, two pieces of wood, sealant, a glue gun and a tire, isn't it obvious? Check out the further pages to see How to make this brilliant Ottoman...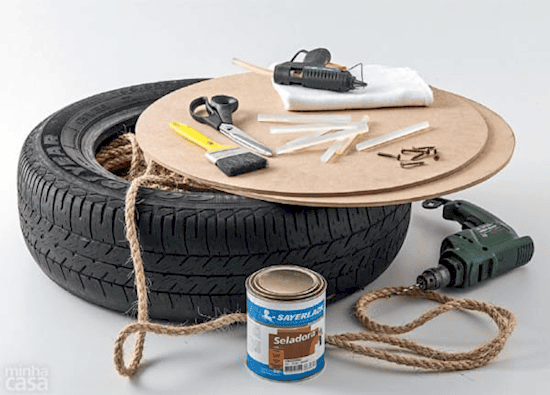
#7 Drillling
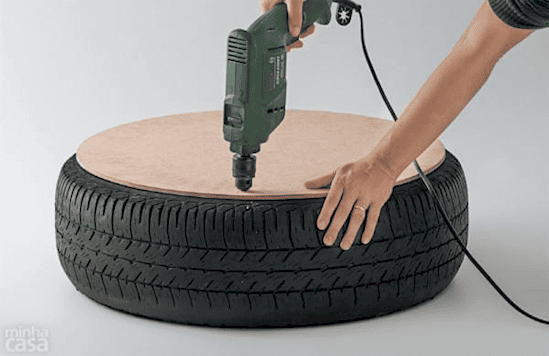
Time for some drilling now! Those pieces of wood aren't going to attach themselves to this tire! Grab that drill and start drilling holes around this baby. Keep them as evenly spaced as possible. This is going to be a masterpiece. Just wait for it!
#6 Screwing Up
Screwing up here is totally allowed. It's time to screw this wood to this tire and make it an official foot stool. It's now functional, but why not make it pretty? So what can we do to make it pretty? Check out the next page to see the further steps.
#5 Find Your Center
Finding your center is the next important step. Measure your tire and determine its center. This is where you're going to start gluing your rope. Start spiraling your rope around itself while gluing it in place. The work is not yet done completely.
#4 Rope Work
After you are done finding the center, it's time to work with the rope. Working with the rope is important so that it will return the favor and work with you. Pause after gluing each spiral to give it time to adhere, it will start to take shape before you know it.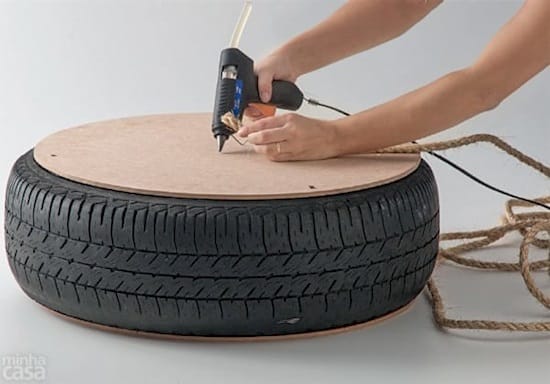
#3 Rough Looks
Once you start rapping up the tire with the rope, it'll start to look something like this. This is the point where you can really see your project taking shape. Make sure your spiral is tight, you don't want gaps.
#2 Bottoms Up!
Once you've covered your top, it's time to fix your bottom. Flip your tire around and begin the same centering and winding process on that side. Tight is the word we cannot stress enough. Check out the final product on the next page!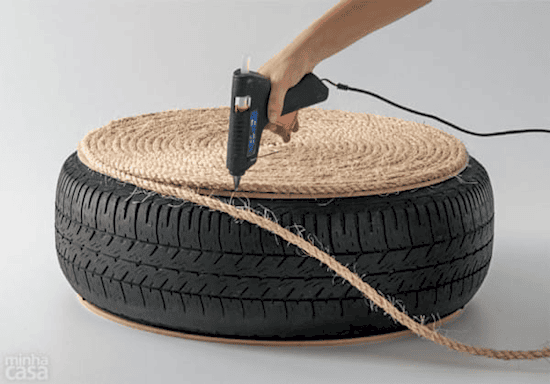
#1 The Final Product
Finally, cut off the extra rope and tuck it under the existing rope. Secure it with glue and let it dry. You're almost done! Now just grab your sealant and brush for the final touch. Glaze on the sealant and let it sit till it no longer smells like sealant. Put your feet up now, you deserve it! Mission accomplished. Now you have a stylish ottoman that you made all on your own out of cheap stuff. Congrats!